Mobile phones have become our very important companions, and their data is crucial to us. I have always regularly backed up my entire phone to my computer. Although this process is not troublesome, it requires manual operation every time, and occasionally I forget.
Is there a more convenient way to complete this process? This blog shares a tool I recently tinkered with friends, which can automatically backup iPhone data to NAS or other Linux servers via Wi-Fi.
Introduction
This tool is based on the open source project libimobiledevice, which is a library for communicating with services on iOS devices via native protocols.
The tool supports deployment via docker on Linux amd64/x86_64 servers, with features including:
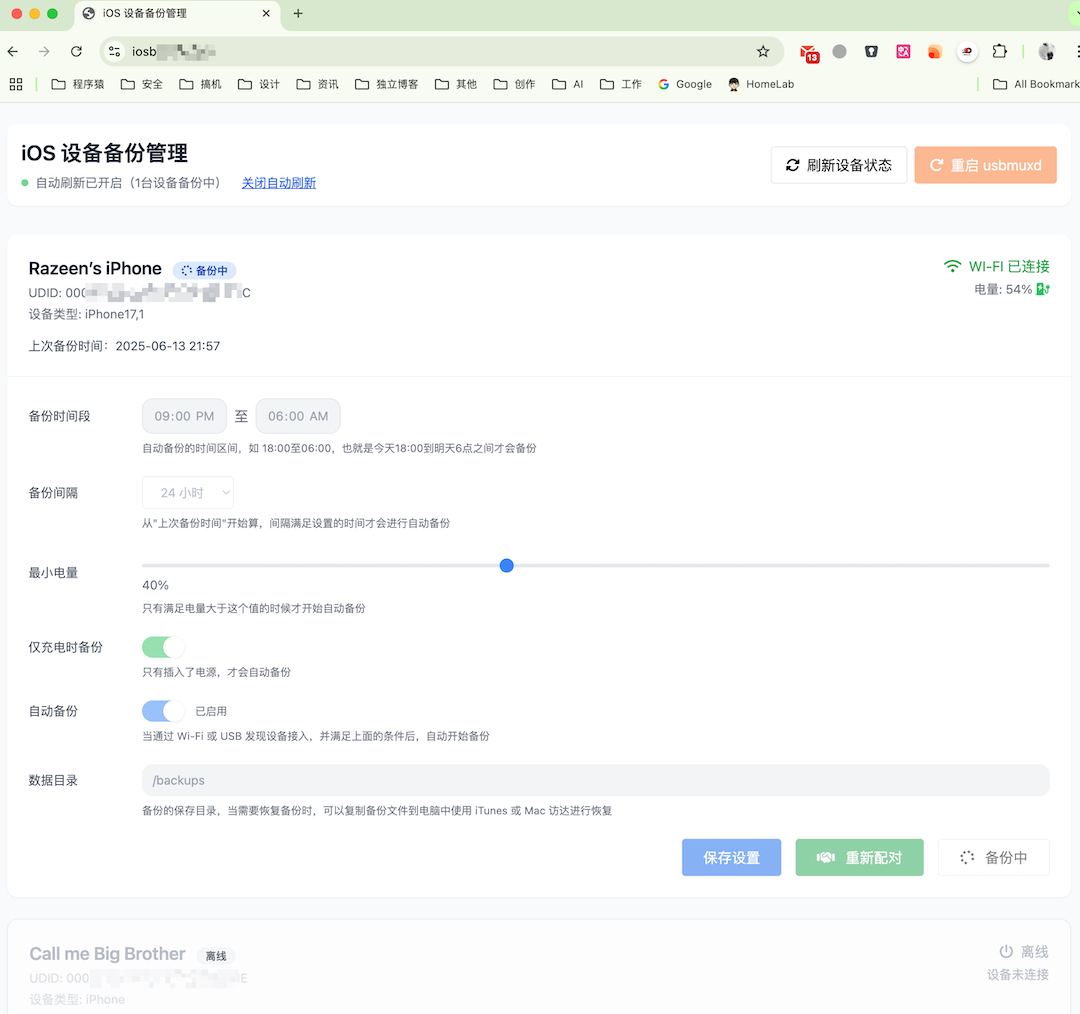
- Specify backup time periods;
- Specify backup intervals;
- Specify minimum battery level to start backup;
- Backup only when charging;
Deployment
Deployment is very simple. The docker-compose.yml file I use on my Ugreen NAS is as follows. Just pay attention to the permissions of the mounted directories below. I have tested and successfully deployed it on Synology DSM 7.2 and Ugreen NAS.
services:
  iosbackup:
    image: razeencheng/iosbackup:latest
    container_name: iosbackup
    restart: always
    network_mode: host
    privileged: true
    environment:
      - PORT=9000 # Set Web service listening port
      - LOG_LEVEL=INFO # Log level, default WARN
    volumes:
      - ./lockdown:/var/lib/lockdown
      - ./configs:/configs
      - ./backups/:/backups
      - /var/run/dbus:/run/dbus
      - /dev/bus/usb:/dev/bus/usb
Auto Backup Settings
Enable Wi-Fi Sync
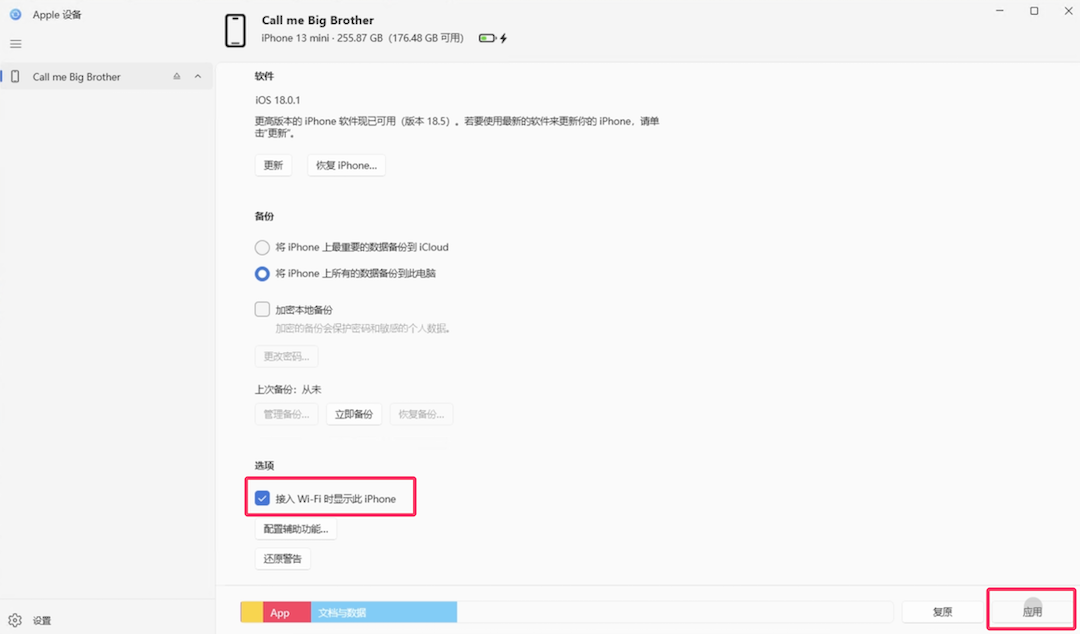
This tool cannot directly enable the device Wi-Fi sync function; you need to use a Mac or PC to enable it.
- Mac
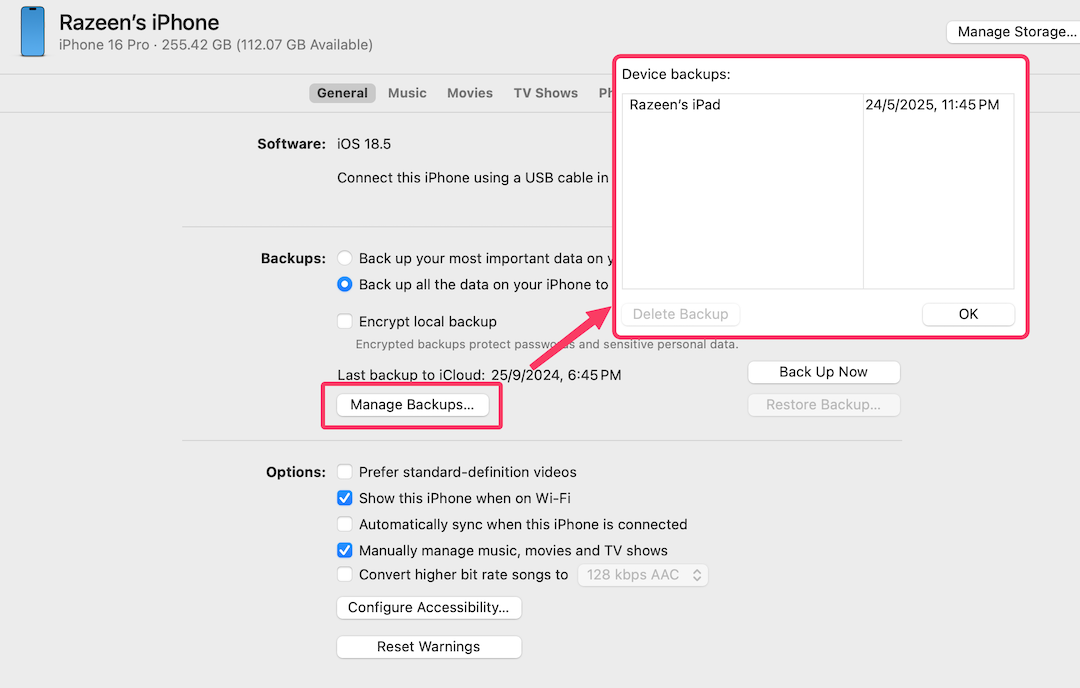
Connect your iPhone to your Mac via USB, tap Trust on your phone, and enter your passcode. Then, open Finder, find your phone, and enable Show this iPhone when on Wi-Fi. After checking it, don’t forget to click Apply.

- PC
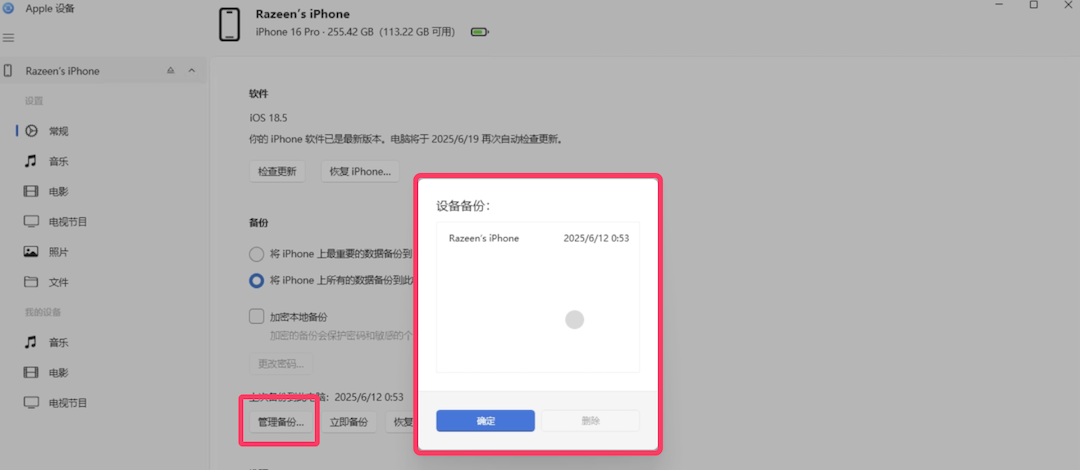
On Windows, you need to download and install the Apple Devices app. After installing and opening the software, connect your iPhone to the computer via USB, tap Trust on your phone, and enter your passcode. Enable Show this iPhone when on Wi-Fi in this software. Similarly, after checking it, don’t forget to click Apply.
Pairing and Settings
- Device Matching
After Wi-Fi sync is enabled, connect the iPhone via USB to the device where the program is installed. If the Trust This Computer popup does not appear on the iPhone, you can click “Restart usbmuxd” and wait for 2 seconds.
After trusting, you need to enter the passcode to confirm. At this point, click “Refresh Device Status” to see your device displayed on the page.
- Backup Settings
Then you can set the backup time period, etc., according to your preferences.
Note that the default backup directory is /backups. If you want to backup to another directory, you need to mount the directory to the host in advance.
Also, after setting up, remember to “Save Settings”. The configuration will not be saved automatically; you need to save it manually.
For the first backup, it is recommended to use USB backup, which is more stable and faster. After a successful backup, every subsequent backup will be incremental.
- Test Wi-Fi Connection
After the first connection, you can unplug the USB, refresh the page, and check if Wi-Fi Connected is displayed. If not, try “Restart usbmuxd” and refresh the page again.
If Wi-Fi Connected is displayed normally, it means the Wi-Fi connection is normal. Note that the phone and the host device running the program need to be on the same local network.
- Auto Backup
When the above settings are completed, enable Auto Backup and save the settings.
After that, as long as the conditions set above are met, the backup will be initiated automatically. Each time a backup is initiated, you need to enter the passcode on the phone again. After the passcode is correct, the backup will start.
Restore
How to restore data after backup? This also requires the help of our Mac or PC.
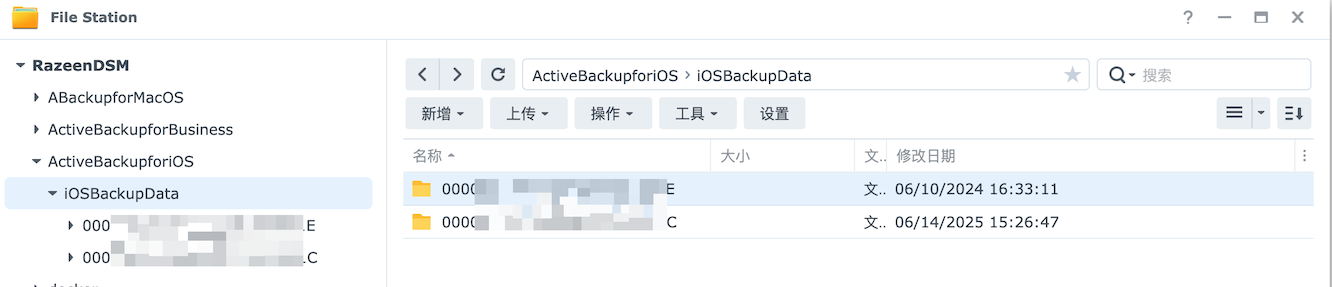
The data structure after backup is as follows, separated by folders according to the device UUID. When restoring, we need to copy the entire folder to the Mac or PC for restoration.
- Mac
The backup directory on Mac is ~/Library/Application Support/MobileSync/Backup/.
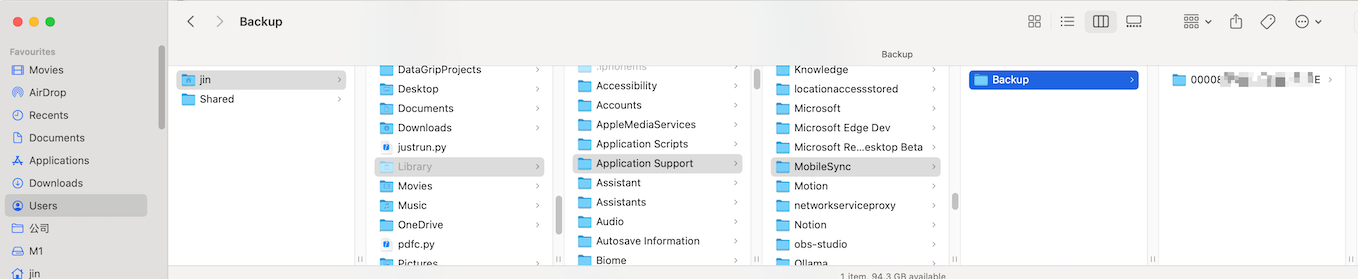
After copying the entire backup to this directory, you can view the corresponding backup in Finder and perform the restore operation.
- PC
PC operation is basically the same as Mac. The backup directory is C:\[User Name]\Apple\MobileSync\Backup, as shown below.

Put the backup file in this directory, and you can view the backup in the Apple Devices software and perform the restore operation.
Conclusion
Currently tested on iPhone 16 Pro and iPhone 13 mini with iOS 18, backups are successful. However, since I don’t have spare devices at the moment, I haven’t performed a complete restore test yet. I might do it later if I have the chance. Friends who are interested and have spare devices can try it out.
In addition, this tool has been used personally and has not been tested on a large scale. There may be bugs or unstable factors. If you encounter problems, please leave a message for feedback.