After I published my guide to backing up an iPhone to a NAS over Wi-Fi last year, quite a few people got in touch with bug reports, feature requests, and requests to open-source the project.
My main commitments kept taking priority, so progress on this side project has been slow. But I’ve kept using it and making changes along the way. Wi-Fi backups, encrypted backups, and notifications have been fairly reliable in my own setup. I’ve also added backup inspection and restore features, though restoring and extracting backups are still experimental and need more work.
Over China’s National Day holiday, I finally found some time to release the updated version and the source code. If you’d like to tinker with it too, you’re welcome to join in.
Here’s a look at what’s changed over the past year, what you’ll need for a new installation, and what to watch out for when upgrading.
Project: iOS Backup on GitHub
What’s new?
First, here’s the updated interface.
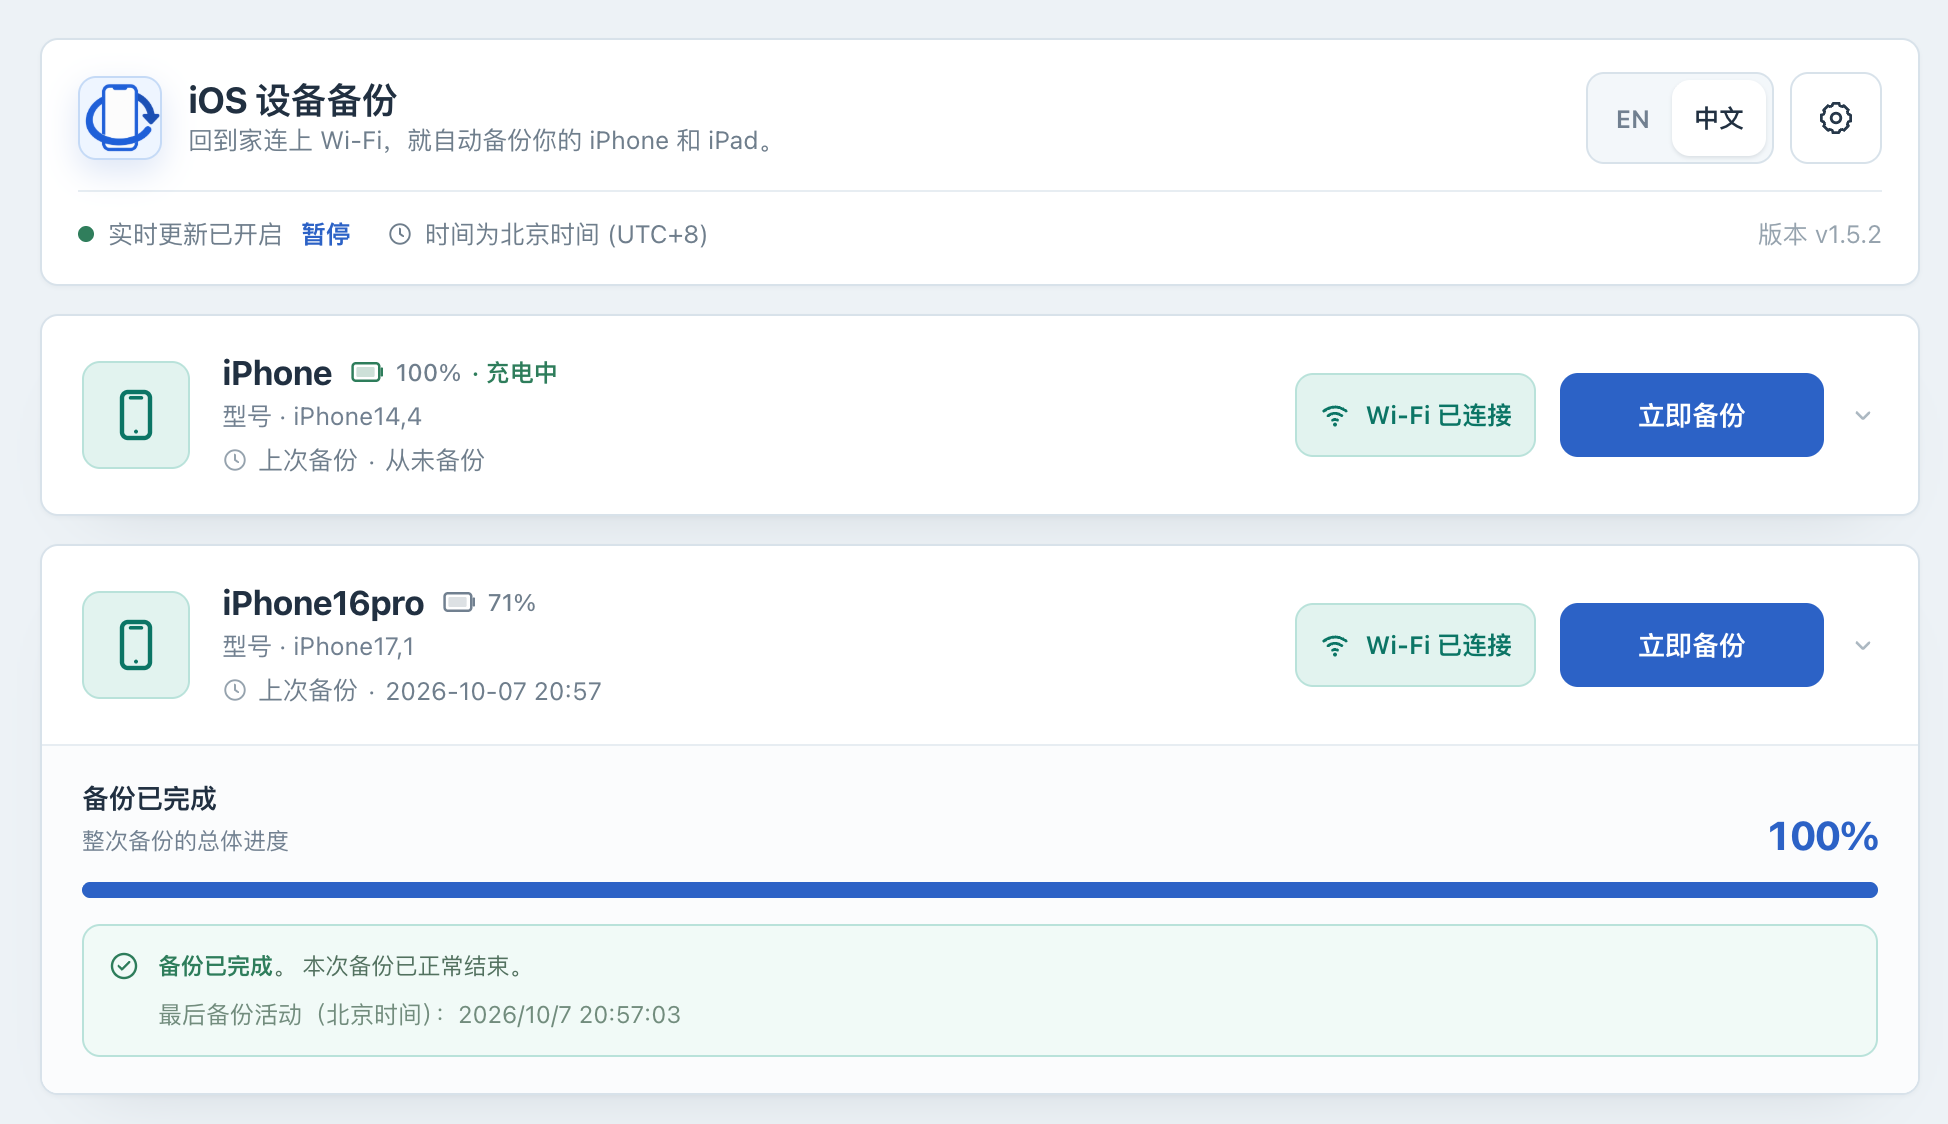
I’ve reorganized the interface and added a few features since last year:
- Admin authentication, designed for a single administrator.
- Backup encryption controls in the web interface.
- Notifications through multiple channels.
- Backup progress reporting.
- A first-run setup guide.
- The ability to remove devices from the dashboard.
- Backup management, including backup details and file listings.
- Container images for both
linux/arm64andlinux/amd64.
A few other features still need care:
- Local backup extraction is experimental and disabled by default. It currently supports only complete, unencrypted backups. See the backup inspection guide for details and limitations.
- Restoring a backup to a device is experimental and disabled by default.
- Backups across networks require additional network configuration. Get backups working on the same local network first.
I’ve only tested restoring and backing up across networks on my own iPad, so I can’t assume they’ll work on other devices or in other environments. If you’d like to try them, read the experimental features guide first, and use a spare device and a separate copy of your backup.
What you’ll need
You’ll need a NAS, Linux machine, or Raspberry Pi that can run Docker, along with enough storage for your backups. The current container images target Linux on amd64 and arm64.
For the initial setup, you’ll also need a USB cable to connect your phone to the NAS and complete the trust and pairing steps. To use Wi-Fi backups, first enable the phone’s Wi-Fi connection option in Finder on a Mac or Apple Devices on Windows. Remember to click Apply after selecting it.
For your first attempt, put the phone and NAS on the same local network and make sure they can reach each other. The NAS can use Ethernet while the phone uses Wi-Fi. Leave guest networks, device isolation, and routing between subnets out of the picture until the basics work.
Give yourself some storage headroom. Check the used capacity under Settings → General → iPhone Storage, then allow some extra space on the NAS. The actual backup size won’t necessarily match the amount of storage used on the phone.
Also, iOS may still ask you to enter your passcode or approve access when an automatic backup starts. If a task is waiting for authorization, check the phone for a prompt.
Installing the new version
I won’t repeat the installation steps here. The project’s illustrated quick start walks through deployment, login, pairing, and your first USB backup. From there, you can set up Wi-Fi backups. I’d also like to put together a video when I have time.
I wrote the outline for the documentation and used AI to help fill it out. If you spot anything wrong, please let me know.
Upgrading an existing installation
If you deployed last year’s version, don’t overwrite your existing deployment directory with the new installation example. Alongside the interface and feature changes, the deployment configuration has changed too, including admin authentication and the application master key.
Before upgrading, turn off automatic backups, wait for any running tasks to finish, then stop the service and save a copy of your deployment data and configuration. Keep the backup directory, the entire configuration directory, the pairing records, and your existing Compose file together. If you use a .env file or a separately configured master key, save those as well. Preserve any master key already in the configuration directory; don’t replace it with a newly generated one.
Next, compare your configuration with the new version and check how each host directory maps to its path inside the container. If you’re migrating from last year’s setup, your backup directory may not be called data/backups. Copying the example without checking the mounts could point the application at a new, empty directory.
After upgrading, check that you can log in and that your existing device settings and pairing records are intact. Complete a manual backup before turning your automatic schedule back on.
The operations manual has the detailed steps. I’ll keep maintaining it as the project develops.
A few closing thoughts
What started last year as a small tool for my own needs now lets me manage devices, inspect backups, and receive notifications through a web interface. It’s taken a fair amount of tinkering to get here.
Progress has been slow, but using it myself has kept the project moving: fix a problem when I find one, add something when I need it. I hope having the source available makes it easier for others to deploy the app and troubleshoot issues.
The project relies on upstream tools such as libimobiledevice to communicate with devices. Thanks to their maintainers, and to everyone who has left comments, requested features, or reported problems over the past year.
The source code and documentation are here:
If you try it, I’d love to hear which phone model, iOS version, and NAS operating system you’re using, and how USB and Wi-Fi backups work for you. If something goes wrong, those details and error logs with sensitive information removed make it much easier to investigate.
If you have a spare device and would like to test restores, or want to help with features or documentation, you’re welcome to get involved.
Feel free to leave a comment on the blog or join the Telegram group.